RULEBOOK
A Game of Bootlegging, Backstabbing, and Gang Warfare.
In the gaslit streets of 1920s New York City, where towering skyscrapers cast long shadows
over a
bustling
underworld, Prohibition has sparked a lawless gold rush. Four deadly mobs battle to rule the city's
illicit Liquor trade. Bootlegging, political bribery, and ruthless intimidation are your tools. You must forge fragile alliances, corner the market, and
weaponize the Police against your rivals. New York is a treacherous dame with a thirst that can't be
quenched.
Only one mob will claim her crown. Will you carve your name into the annals of infamy, or vanish like cigar
smoke in a hurricane?
A Day in the Life of a Kingpin
2-4 Players | 90 - 120 Mins
Prohibition didn't stop the drinking; it just made the price go
up.
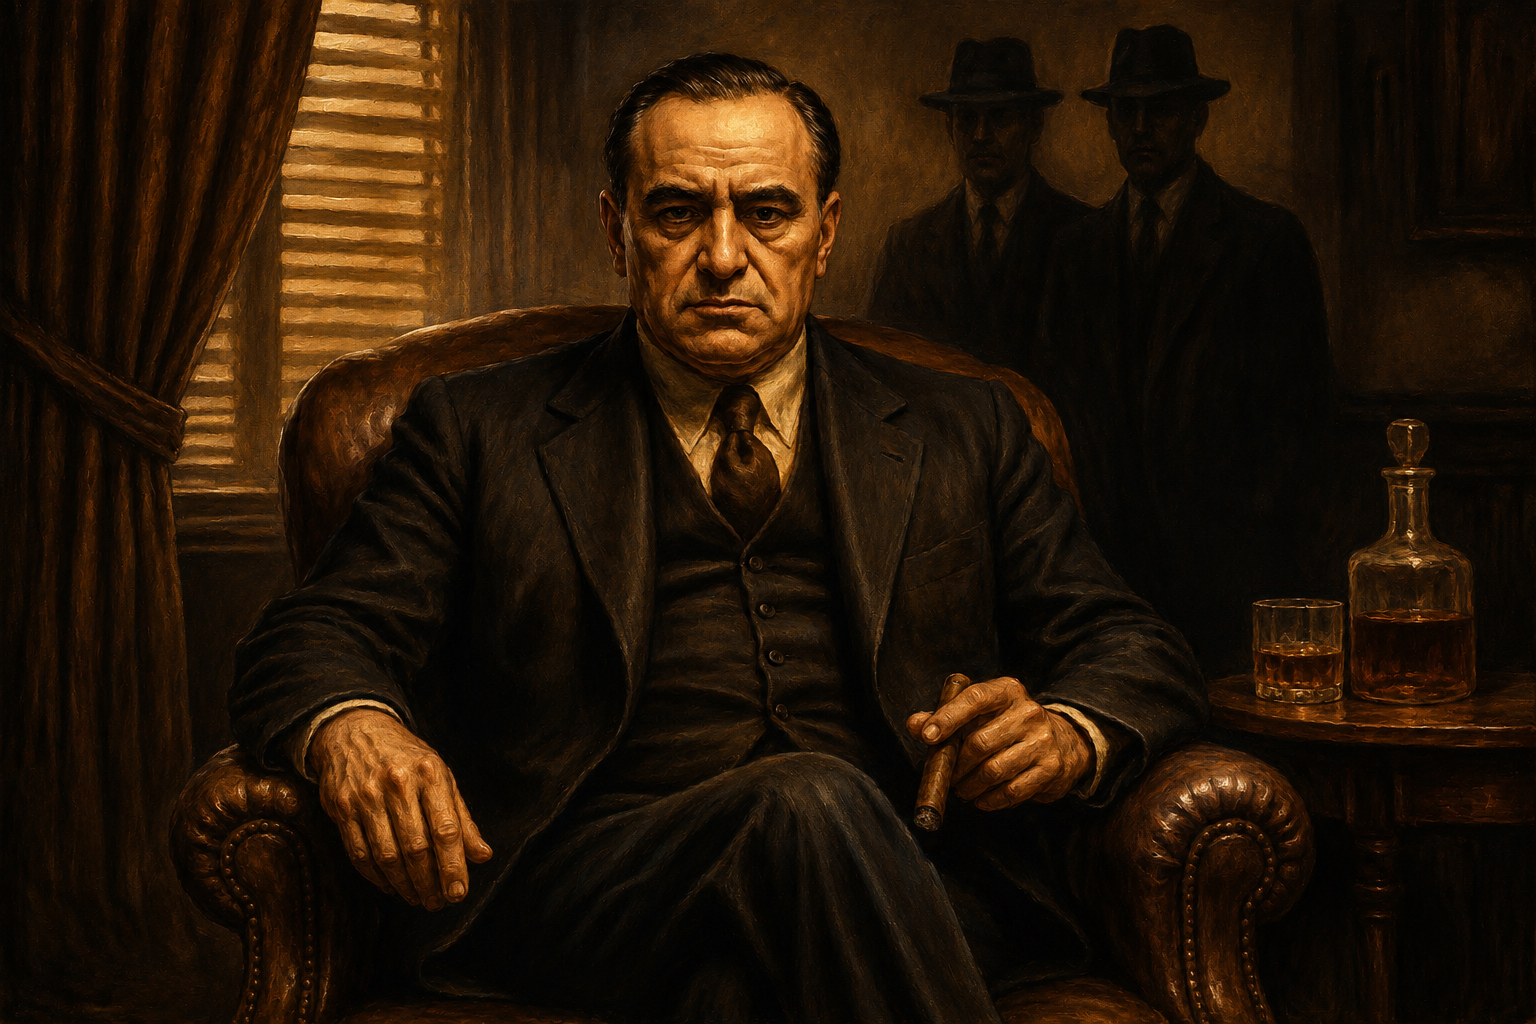
In Moonshine Kingdom, you are a rising Kingpin in 1920s New York. Prohibition has turned
off the taps, creating a gold rush for anyone ruthless enough to fill the glass. Four rival mobs claw for
the boroughs, and this city isn't big enough for all of you. The game is played over a series of Days.
Each Day unfolds in three brutal phases: from the fog of morning
to the bloody consequences of night, outmaneuver your rivals to survive.
Morning: Shadows Phase
Dawn breaks over the Hudson. Before the city wakes, the boilers burn. Fire up your Stills, stake your
black-market Contracts, and turn cheap mash into liquid gold.
Day: Operations Phase
The sun is up, and so is the heat. Command your Runners to smuggle product, seize turf, and strong-arm
the competition. Every move costs Influence - your political clout. Use it to expand, but
remember: violence is loud, and the police are listening.
Night: Reckoning Phase
Twilight settles like a bruise. The guns go quiet, the blood washes into the gutters, and the ledger opens.
Claim your turf, cash in your Contracts, and let the night patrol sweep up the careless. Did you make a killing today, or just a mess?
The Only Crown Worth Having
Cash buys bullets. But Respect buys immortality.
You earn Respect by conquering Boroughs, claiming Syndicates, pulling off Contracts, and holding the Ghettos
long enough to be named Ward Boss. The first mob to earn 20 and a seat at the High Table
claims her crown.
Game Components: Tools of the Trade
Your whole damn operation in miniature. Every piece earns, bleeds, or burns.
The City Map (Game Board): A soot-stained blueprint of 1920s New York, carved into 25 Districts. It includes:
- The Heat Track: A shared 5-space powder keg tracking Police pressure.
- The Market: The pulse of the city's thirst, tracking the street value of all four liquors.
Operations Boards (x4): Your personal command center. A slotted board used to manage your daily action economy and cycle your Influence.
Mob Pieces (x4 Sets): Each player claims a color and takes command of:
- 1 Boss, 15 Runners, and 3 Safehouses: The meat, the grinders, and the hideouts.
- 12 Influence Markers: The currency of the underworld. Tokens used to pay for daily actions, stake Contracts, and absorb Police Heat.
- 1 Mob Playbook: The family secrets and your unique mob abilities.
The Ledger (Cards): The paper trail of your empire.
- Contract Cards: High-risk, high-reward jobs that build your legend.
- Syndicate Cards (4): The keys to monopolizing and fixing the liquor market.
- Borough Deeds (5): Proof of your dominion over the city's major territories.
- Ward Boss Card: The ultimate street credential for ruling the Ghettos.
- Shylock's Mark Cards: Debt trackers. A lifeline with teeth.
- The Rat Card (1): The ultimate sin in cardboard form. A hot-potato mark of shame that kills your street cred and freezes you out of the underworld.
- Favor Cards: Proof of your binding ties to the city's corrupt elite.
- Commission Cards: Your ticket to the High Table.
Still Tokens (25): Hidden basement boilers numbered 2-12. Flipped to produce hooch when the dice roll your way.
Turn Tokens (8) & Moon Marker: Tokens used to track daily initiative, alternating between New Moon and Full Moon phases.
Liquor Barrels (100): Liquid gold in four flavors: Moonshine (Grey), Bathtub Gin (Pink), Whisky (Yellow), and Havana Rum (Brown).
The Dice (10): 5 White and 5 Red. Used to brew product, smuggle rum, and settle grudges.
The Bankroll (Cash): Dirty, untraceable bills in denominations of $100, $500, and $1,000.
The Law (Blue Pieces): The blue wall that wants to see you swing.
- Precincts (5): Fortified station houses that mark Police Turf.
- Federal Crackdown Tracker (1): A 10-space pressure clock used in the 4-player team variant.
Key Concepts: The Underworld at a Glance
Your Mob: The Brains, the Brawn, and the Bastards
From the cold steel of the Sicilian Syndicate to the fiery grit of the Hell's
Kitchen Irish, each mob brings their own brand of violence to the city's bloodstained ballet. You command:
- A Boss: Your kingpin. The head of the snake. Bring him into a firefight to make your attacks deadlier, but if he catches a bullet, your crew is crippled until you crown a successor.
- Runners: Your foot soldiers. Knuckle-draggers and wheelmen who haul hooch, guard your turf, and catch your bullets. You are strictly limited to 15 Runners. You cannot build a massive army to occupy the whole city. To expand, you must leave borders thin and rely on the threat of violence rather than an actual army.
- Safehouses: Your fortresses in the chaos. They lock down Turf even when empty, provide a massive defensive advantage during shootouts, and serve as the only places you can Recruit fresh muscle.
The Map: Know Your Turf
Your empire is a broken city: 25 Districts across 5 Boroughs, each a flavor of poison and profit. Certain key districts offer unique opportunities:
- Speakeasies (Cocktail Glass): The only spots where you can Unload liquor for cash. The city's 12 Speakeasies are divided into 4 types: 3 Gin Joints, 3 Whisky Bars, 3 Moonshine Dens, and 3 Rum Clubs. Each Joint has a House Pour (its signature liquor); feed them their favorite poison to earn Kickbacks.
- High Society Districts (Crown): Affluent neighborhoods where the rich, powerful, and corrupt reside. Control these districts to Bribe the city's power brokers and earn permanent Influence. All High Society Districts also contain a Speakeasy.
- Ghettos (Fist): Gritty blocks where mob roots run deep and every alley has ears. Control the most Ghettos during Reckoning to claim the Ward Boss card, which significantly cuts the cost of Recruiting new Runners.
- Docks (Anchor): Your link to the waterways. Crucial for Smuggling premium Havana Rum and bypassing land blockades to move across the city's shores.
- Stills: Hidden basement boilers marked with a number (2-12). When the dice roll their way during the Shadows Phase, they pump out Domestic liquor—or explode in your face.
The Currencies of the Underworld
To rule the city, you'll need more than just bullets. You'll need to master its three core resources:
- Cash: Expands your crew. Spend it to Recruit and Secure turf. Earn it by Unloading, Extorting, and pulling off Contracts.
- Liquor Barrels: Your lifeblood. Brewed at Stills or smuggled from Rum Row. Values fluctuate based on Syndicate control.
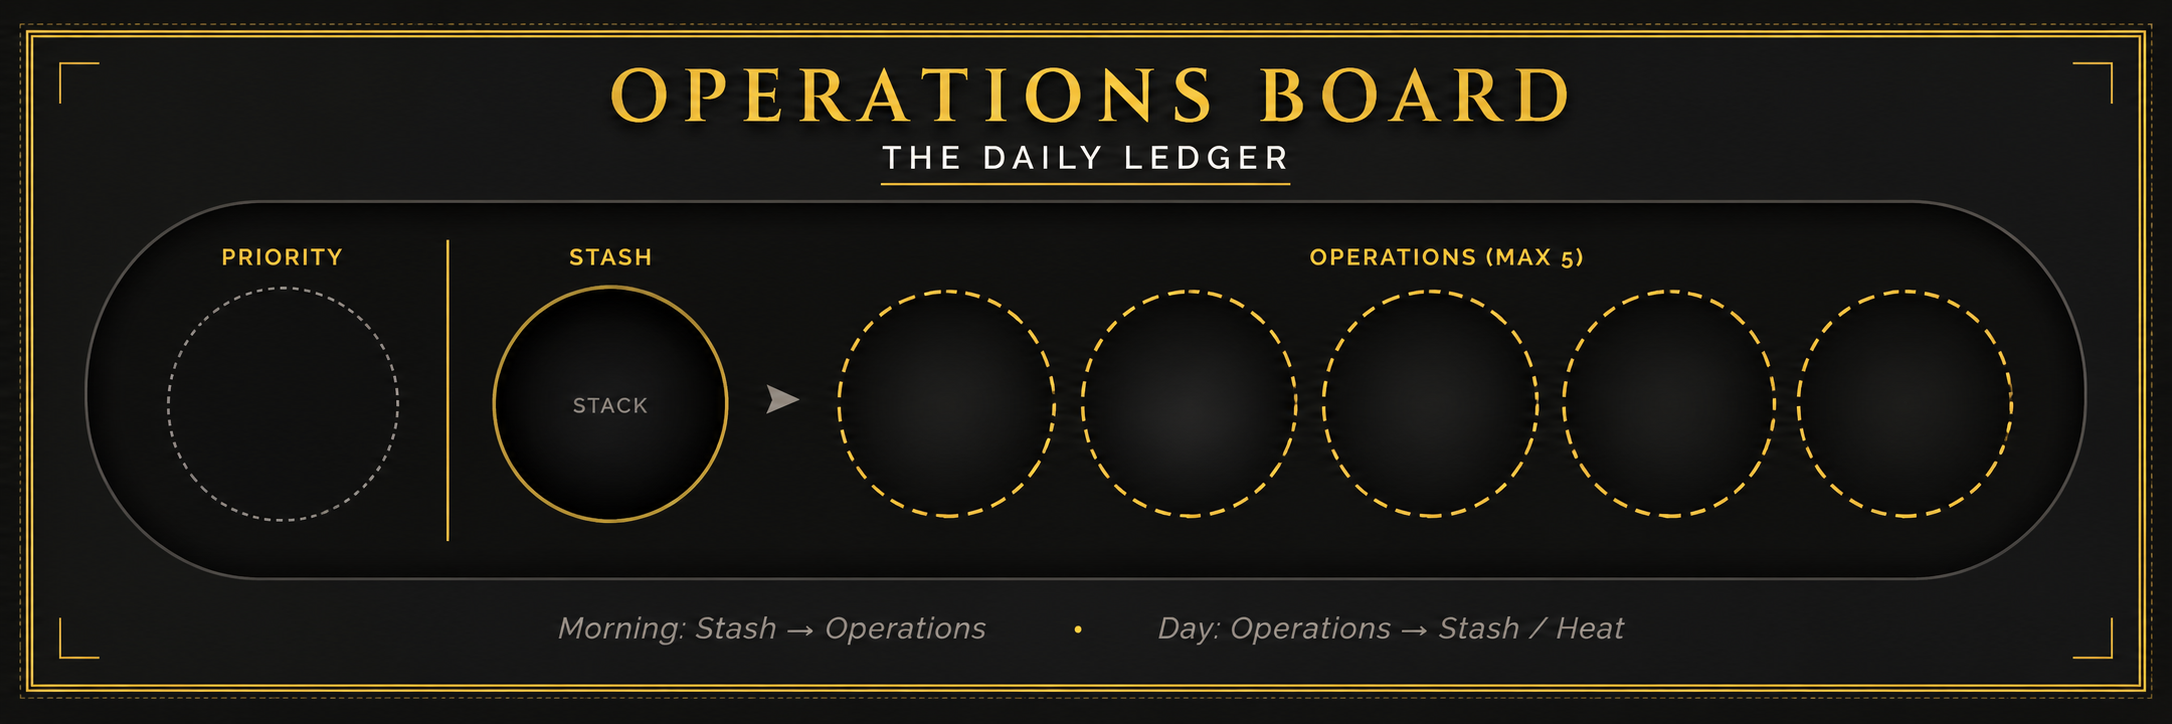
Influence: Currency of Power
Influence is your political clout. You start the game with 7 markers (earn more by Bribing brokers). These markers cycle through your Operations Board:
- The Stash (Reserves): Uncommitted markers stack here. Use these to stake new Contracts.
- Fund (Shadows Phase): Move up to 5 markers from your Stash to your Operations slots. Excess markers stay in the Stash and cannot be used for Plays today.
- Execute (Operations Phase): Spend markers from your Operations slots to make Plays.
- Resolve (After the Play): Quiet Plays return spent markers to your Stash. If the Play generates Heat, the marker is locked onto the communal Heat Track instead.
Kingpin's Tip: Capacity vs. Time
Extra Influence does not give you more daily actions—your board is strictly capped at 5 slots. A massive Stash simply gives you the capacity to absorb Heat, survive Police Raids, and stake multiple Contracts at once without crippling your daily hustle. You can't out-action your rivals; you have to out-think them.
Territory: Lines in the Concrete
An empire isn't just bullets and blood; it's about logistics. It's about moving product and drawing borders your rivals are too terrified to cross. Because your muscle is spread thin, a cleverly placed Safehouse and a handful of loyal guards are often enough to deter a full-scale turf war.
1. Control: Boots on the Ground
You can't tax what you don't hold. You control a District if you have at least one Mobster (Boss or Runner) OR a Safehouse present there.
- Instant Possession: Control shifts the moment your piece enters a District. (Moving through an unoccupied District claims it for that exact instant).
- Abandonment: A barrel of gin can't hold a street corner. If your last mobster vacates a District and there is no Safehouse left to anchor the block, you immediately lose Control. Any liquor left behind just waits to be stolen.
- The Golden Rule of Turf: During the Shadows and Reckoning phases, there can be only one mob in a District. While you hold a District, rivals cannot enter without triggering combat.
- Contested Ground: During a firefight, the original Occupier retains Control (and all defensive bonuses) until their last piece is removed or retreats.
2. Safe vs. Hostile Turf
Knowing where you can move your hooch is the difference between a payday and a bloodbath.
- Safe Districts: Any District you currently Control, plus any Defenseless District (meaning it contains no Rival Mobsters or Police). Unattended liquor and unguarded Rival Safehouses do not make a District hostile; you can freely walk in and instantly claim them (Commandeering the Safehouse).
- Hostile Districts: Any District guarded by Rival Mobsters or the Police. Stepping onto Hostile turf immediately leaves your mobsters Pinned.
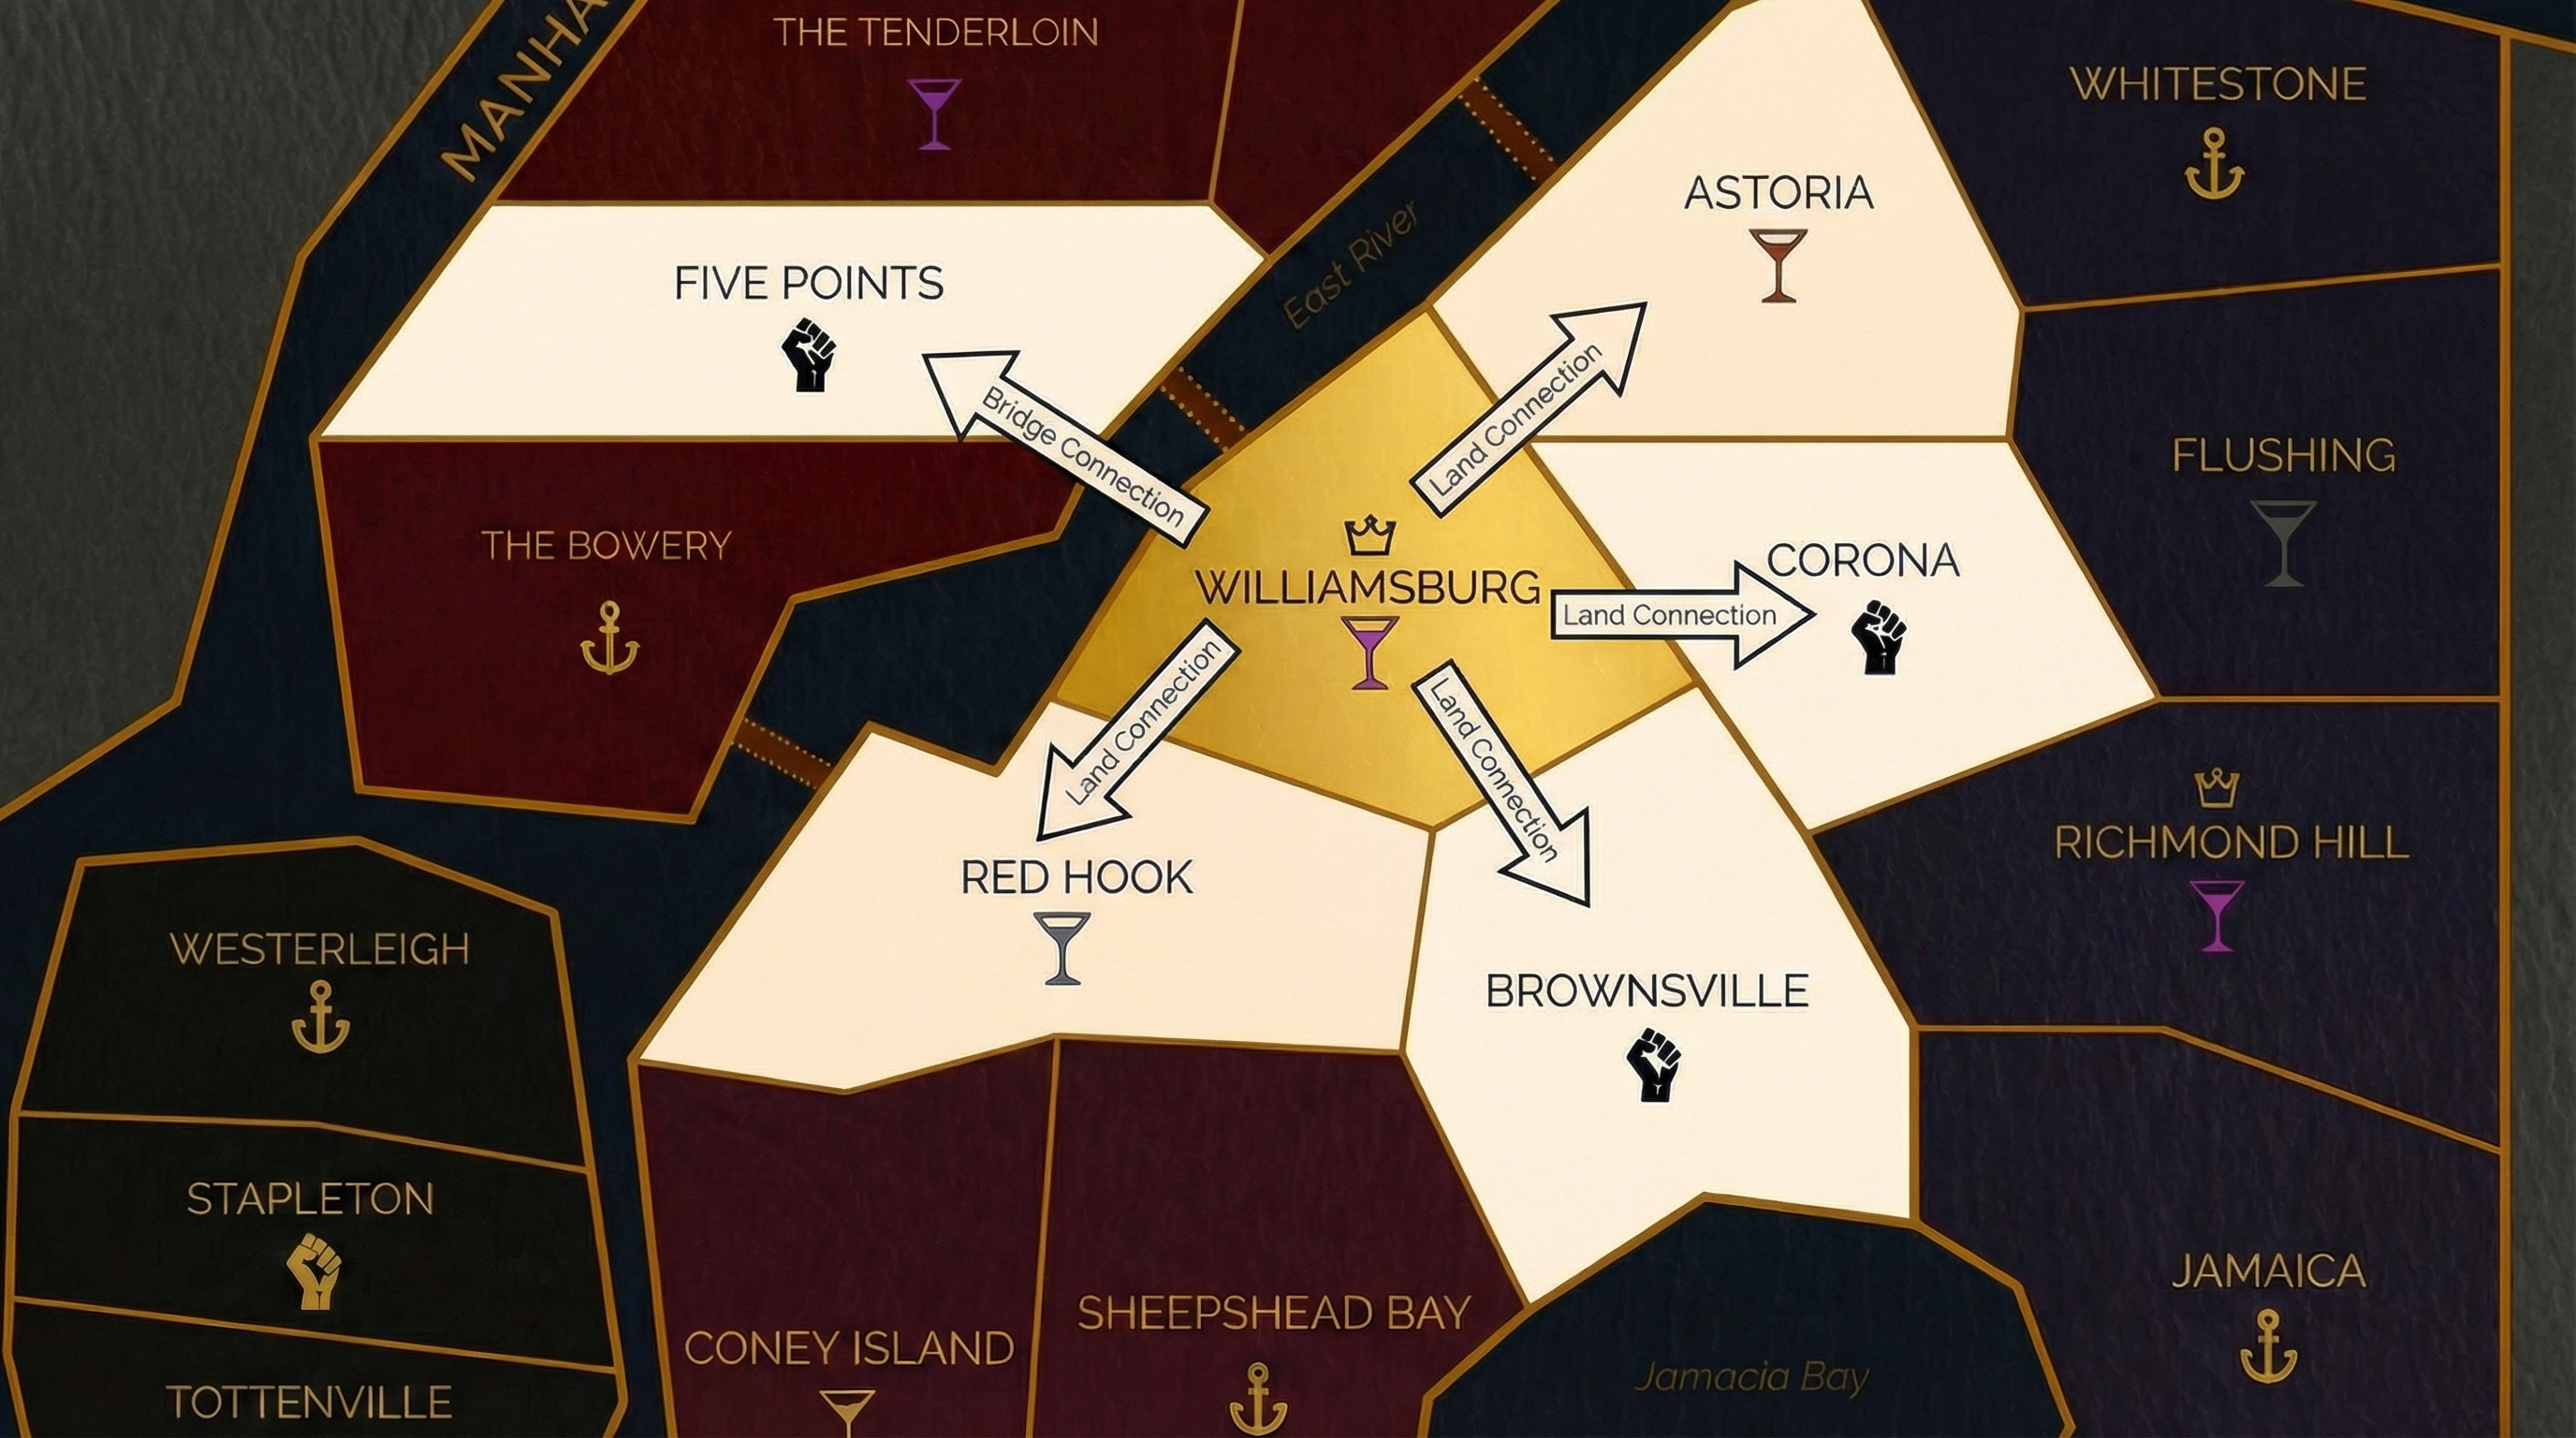
3. Connection: The Network
Knowing the layout of the city is key to flanking enemies and bypassing blockades. Districts are Connected if:
- Land & Bridges: They share a physical border or are linked by a Bridge.
(e.g., Williamsburg connects to Red Hook, Brownsville, Corona, and Astoria by land, and to Five Points by Bridge).
- Waterways (Docks): All Dock Districts connect to each other across the water as if they were adjacent.
(e.g., You can Move directly from West Side to Thorggs Neck in one Play).
Your Goal: Earning Respect
Respect is the only currency that matters in Moonshine Kingdom. Earn it two ways: claim
Titles by controlling the city, and complete Contracts by pulling off
jobs too loud to ignore.
1. Titles: Carving Up the City
Titles are the proof that the street belongs to you. Borough Deeds, Syndicate Cards, and the Ward Boss card
all follow the same hard rule:
During the Reckoning Phase, to claim a Title, you must hold the most Districts or Joints of that type (minimum 2). If there is a tie, the Title returns to the Supply.
Police do not count as rivals; Police-controlled Districts, Joints, and Ghettos count as empty for Title
checks.
Borough Deeds
Seizing a Borough turns muscle into empire. Hold the most Districts in a Borough (minimum 2) to
claim its Deed. Boroughs are worth 3 Respect, except Staten Island at 2. Deeds also unlock
that Borough's Extort action.
Syndicate Cards
The city's 12 Speakeasies form four syndicates. Hold the most Joints of a liquor type (minimum 2) to
claim its Syndicate Card for 2 Respect and the right to fix that liquor's price.
The market doesn't move unless you force it. A Syndicate holder may use Fix to set that liquor's
Market Value.
- The Ceiling: Set the price from $200 to $200 + $100 per matching Joint you
Control (max $500).
- A Broken Market: If a Syndicate Card is unclaimed, that liquor's Market Value remains
frozen at its current price until a new Syndicate holder emerges to change it.
Ward Boss
The Boroughs make headlines, but the Ghettos decide who owns the block. Hold the most Ghetto Districts
(minimum 2) to claim the Ward Boss card. While you hold it,
Recruit costs $200 per Runner, and it's worth 3 Respect at endgame.
2. Contracts: Forge Your Legend
A mob's reputation isn't built on promises; it's built on results. Contracts are the high-stakes jobs that turn a corner hustler into a Kingpin.
Every Contract demands a specific Objective and sets a merciless Deadline. They come in three escalating tiers of ambition:
- Gigs (1 Day / 1 Respect): Quick street hustles. Keeping the lights on and the cops paid off.
- Rackets (2 Days / 3 Respect): Mid-level capers. Operations that require turf, muscle, and a solid plan.
- Scores (3 Days / 5 Respect): Front-page heists. The kind of bloody legends they write ballads about.
The Ticking Clock
When you stake a Contract, you're making a promise to powerful people. Place Influence markers from your Stash onto the card equal to the deadline (1, 2, or 3). These markers are locked up in planning. One marker is returned to your Stash during every Reckoning Phase.
During the Reckoning Phase, if you pull the final marker off the card, The Deadline has arrived. Your clients don't care about excuses, and they don't care what turf you held yesterday. They only care about the board at that exact moment.
- Completed: If you meet the objective, you deliver. Add the card to your Respect pile and collect your Take.
- Botched: If you miss the mark, you fail. Discard the card face-up into its deck's discard pile. In this town, nobody pays for 'almost'.
The Take
Pulling off a job doesn't just buy respect; it buys bullets. When you complete a Contract, the client immediately pays out a one-time cash reward:
- Gig: $500
- Racket: $1,500
- Score: $3,000
The Commission
Any street thug can knock over a speakeasy, but building a diverse portfolio proves you run an empire. Completing a Gig, Racket, and Score earns you a seat on The Commission, a strict requirement to win the game (see Winning the Game).
Setup: Carving Out Your Corner
-
Prepare the City:
Unfold the Game Board and lay out the Cash and Dice. Set the starting street prices: Rum $500, Whisky $400, Gin $300, Moonshine $200. Seed the city by placing one random face-down Still token in every District, then flip them all face-up to reveal the boiler numbers.
-
Stack the Ledger:
Shuffle the Gig, Racket, and Score decks and place them face-down beside the board. Keep the Shylock's Mark cards close by--someone will need a loan soon. Leave all other decks in the Supply.
-
Claim Your Crew:
Shuffle the Playbooks and deal one to each player to assign their family. Take your command center (Operations Board) and your muscle: 1 Boss (2 for Sicilians), 15 Runners, and 3 Safehouses.
-
Establish Turf:
Nobody starts on Staten Island; return its Deed to the box. Shuffle the four remaining Borough Deeds and deal one to each player. This is your home turf. Deploy your starting forces to the three Districts listed on your Deed: Place 1 Safehouse, 1 Boss, and 2 Runners in your Ghetto. Place 3 Runners at your Dock, and 3 Runners in your Speakeasy.
The Blue Wall: The law already owns the ritzy neighborhoods. Place 1 Precinct in every Borough's High Society District, and the 5th Precinct in Stapleton (Staten Island's Ghetto).
-
Get Your Cut:
The bankroll for a rising kingpin. Take $1,000 cash and 7 Influence markers. Slot 5 markers onto your Operations board, and drop the remaining 2 into your Stash.
-
Turn Order (Who Strikes First):
Randomly deal the New Moon Turn Tokens (#1 through #4) to set the morning's initiative. Set the Moon marker to New Moon and keep the Full Moon tokens nearby.
In this city, the fast eat the dead. When you run out of Influence or choose to Lay Low, immediately swap your token for the lowest numbered available Turn Token of the opposite moon phase (e.g., snagging #1 ensures you shoot first tomorrow).
Gameplay: Run the Streets
Days unfold in three brutal phases: Shadows (Production), Operations (Plays), and
Reckoning (Cleanup). In Turn Order means player #1 acts first, down to #4.
Phase 1: Shadows
Dawn breaks over the Hudson. In Turn Order, each boss scrambles for product, plots new capers, and braces for explosions.
1. The Brew
Turn Token #1 rolls the communal dice pool:
Roll Red and White dice each equal to the Player Count + 1.
(e.g., In a 4-player game, roll 5 Red and 5 White dice).
The Churn: In Turn Order, draft 1 Red and 1 White die from the pool. Add them together to get your Brew Number. You must immediately choose one of two options:
- Produce: Every matching Still fires up, including rivals'. Brew Domestic Liquor (Gin, Whisky, or Moonshine) based on your crew size using The Muscle Ratio. First to draft gets the goods; if supply runs dry (Dry Tap), production stops.
- Dump the Mash: Discard your drafted dice. No Stills fire. You get nothing, but those dice cannot go to rivals or trigger Blowback.
2. The Blowback
Once every boss has drafted, add together the two leftover undrafted dice (1 Red, 1 White) to get the Blowback Number.
Copper pipes burst and basements burn. Every matching Still explodes. Tally casualties using The Muscle Ratio. Runners take the shrapnel first; an unprotected Boss goes home in a pine box.
The Muscle Ratio
Mobsters
Brewed
Dead
1 - 2
1 Barrel
1 Dead
3 - 4
2 Barrels
2 Dead
5+
3 Barrels
3 Dead
Kingpin's Note: The Muscle Ratio is the same count-to-result rule everywhere. For Brewing, Blowbacks, and Raid arrests, it caps at 3. In Combat, it keeps scaling to a maximum of 5 dice. Extra muscle past those caps does not improve that roll.
3. Grease the Wheels
- Stake Contracts: Reveal Contracts from your hand. Place Stash markers equal to each card's Days to Deadline (1, 2, or 3). You may stake as many as you can afford. Place markers from your Stash onto the card. These markers are locked; they cannot be used to fund Plays until they are returned during Reckoning.
- Fund Operations: Move up to 5 markers from your Stash into your Operations slots. Any markers left in your Stash cannot be spent on Plays today.
Phase 2: Operations Phase
Operations runs in Turn Order, one Play at a time.
- Standard Play: Spend Influence to perform 1 Action (known as a Play): Move, Recruit,
Push, etc.) or 1 Power Play (e.g. Unload).
- Combat Play: If combat is triggered, resolve it fully before the Play ends.
- Paying for Plays: Remove the spent marker(s) from your Operations and return
them to your
Stash. If a Play generates Heat, place 1 spent marker onto the Heat Track.
Any remaining spent markers return to your Stash.
- Laying Low: When you run out of Influence (or choose to step off the street early), you
must Lay Low:
- Clear any remaining markers from your Operations to your Stash.
- Swap your current token for the lowest numbered available Turn Token of the opposite moon phase (e.g., claiming #1 to guarantee striking first tomorrow).
| Standard Plays (Cost: 1 Influence) |
| Move |
Move any number of mobsters (carrying max 1 barrel each) to one Connected District. Entering Rival
or Police turf immediately leaves your mobsters Pinned. Rivals get a Standoff choice first;
Police won't fire, but instantly smash any carried liquor. |
| Push |
Redistribute any number of barrels between a District you Control and one Connected District. Use this to reorganize your own supply lines, or to trade with a rival (with their permission). Pushed into rival turf? Thanks for the donation. It's their hooch now. |
| Recruit |
Hire Runners at your Safehouse for $300 per Runner. Cost drops to $200 per Runner if
you are the Ward Boss. |
| Hustle |
Boss must be in play. Draw 2 Contracts (3 with Texas Guinan's Favor). Discard down to your Hand Limit (default:
3, or 5 with Texas Guinan's Favor). If a Contract deck ever runs dry, immediately shuffle its face-up discard pile to form a new face-down draw deck. Limit: once per Day. |
| Secure ($500) |
Establish a foothold. Place a new Safehouse in your District, or relocate an existing one to your current District. |
| Smuggle |
At a Dock District you Control: Send up to 5 Mobsters from the Dock to roll for Havana Rum
(failed dice = arrests; Runners take the fall first).
|
| Title Plays (Cost: 1 Influence) |
Extort  |
Borough Deed required. Shake down the locals. Once per Day, earn $200 per District you Control in that
Borough. Earning $800+ (controlling 4 or more Districts) is noisy and generates Heat. |
| Fix |
Syndicate Card required. Set that liquor's Market Value between $200 and
$200 + $100 per matching Joint you Control.
Example: If you hold the Gin Syndicate and Control 3 Gin Joints, you may Fix the price of Gin anywhere from $200 to $500. This price remains frozen until changed. |
Power Plays
These Plays cost two Influence markers to perform, but count as a single Play in the turn cycle.
| Power Plays (Cost: 2 Influence) |
| Unload |
Cash Out: Sell barrels at a Speakeasy you Control for their current Market Value.
The Kickback: Speakeasies pay in favors for their favorite poison. For every barrel sold that matches the Joint's House Pour, immediately move 1 spent Influence marker from your Stash back into an empty slot on your Operations Board. (Note: Your board caps at 5 slots. Any Kickbacks earned beyond your empty slots are wasted).
The Greed Tax: Unloading 4+ barrels of any type in a single Play generates Heat. If this Unload was paid for with two different players' markers, you choose which spent marker goes to the Heat Track. Max safe delivery is 3, unless you hold Stephanie St. Clair's Favor.
|
| Rat |
There's no honor among thieves when the sirens wail. Drop a dime on your rivals. As long as there is at least 1 marker on the Heat Track, trigger an immediate Police Raid. The Raid targets the player who currently has the most (or most recent) markers on the track.
The Mark of the Snitch: Ratting is the ultimate street sin. When you make this Play, you immediately take the Rat Card from the supply (or snatch it from the rival currently holding it). While you hold this card, you are a pariah; nobody will do business with you, meaning you cannot perform the Hustle Play.
|
| Rise |
Boss in the morgue? Time to anoint a successor. Appoint a new Boss ($0) in any District you Control, or any Unoccupied District, and immediately spawn 2 free Runners with them. You may also instantly Secure this District for free by placing or relocating a Safehouse there.
|
| Bribe |
Pay off one of the City's Power brokers in a High Society District you control for
$2,500.
Take that District's Favor card and gain 1 permanent Influence marker in your
Stash. Each player may buy each High Society Favor once per game. You keep it even if you
later lose the District.
|
Mob Signature Plays
Every crew has tricks up its sleeve: signature moves to outfox, out-muscle, or outrun the competition. Each
mob has two unique plays.
Sicilian Syndicate
Old blood, older rules. An insult to the family is a death
sentence.
| Capo (Cost: 2) |
Promote a Runner from any District to Capo (switch Runner for the spare Boss
piece). Your Capo
is a second Boss, providing stability and gaining +1
Threat in Combat (+2 when both Bosses attack one District). You may only have 1 Capo (2 Bosses
total).
|
| Consigliere (Cost: 1) |
Use your connections to smooth over legal troubles. Remove 1 Influence marker of your choice
from the
Heat Track and return it to its owner's Stash (move other markers down to fill gaps if
required).
|
Hell's Kitchen Irish
They brew it strong and fight dirty. Why buy bullets when a brick works just fine?
| Courage (Cost: 0) |
Before you roll dice for an Ambush or for an Assault that you initiated, you may
discard 1 of your Liquor barrels located in that District to gain +1 Threat for that
roll. You cannot use Courage to boost your defense when a rival initiates an Assault against
you. |
| Plunder (Cost: 1) |
Initiate a special attack. For each successful hit,
instead
of eliminating a mobster, steal 1 Liquor barrel of your choice from the target District. You can
carry these away if you Advance. Defender hits still kill. You may also
choose to Plunder when you Ambush (Cost: 0). Plunder does not create Heat.
|
East Side Vipers
They move like smoke and strike like snakes. You won't know they're there until the shots come from the
shadows.
| Stealth (Cost: 1) |
Move up to 5 mobsters (no liquor) into a connected rival district without triggering a Standoff
(the Defender cannot Ambush or Fold). You cannot end your Play in this state. You must immediately
spend another Influence to either:
Assault the district, or Advance to a connected safe district.
|
| Firepower |
Pay a flat $200 when you Assault or Ambush to roll exactly one additional attack
die (up to a maximum of 5). You cannot pay extra to buy multiple dice. Cannot be used when
defending an Assault.
|
Harlem Knights
Dressed to kill, literally. The Knights hit from the water and leave warehouses burning.
| Skiff (Cost: 1) |
Move up to 5 mobsters (with or without liquor) from a Coastal District you control to any other
Coastal District. This movement does not require Docks. If you enter a Rival District, standard
Ambush rules apply.
|
| Torch (Cost: 2) |
Burn down a Safehouse in a rival District. To perform this Play, you must have at least one Runner
Pinned in the target District. Sacrifice one of those Pinned Runners; he strikes the match and goes up with the flames. He is removed from the game.
The rival's Safehouse is immediately destroyed (return it to their supply). Any rival mobsters and
liquor in the District are unharmed and retain Control. This Play generates Heat.
|
Phase 3: Reckoning Phase
Once the guns go quiet, the city settles its accounts. Each Reckoning stage is resolved
simultaneously by all players.
1. The Sweep
The cops don't mind a hustle, but they hate an army. The night patrol sweeps the streets, throwing excess muscle into the paddy wagons. Any District with more than 5 Mobsters
faces arrests. Remove excess Runners to bring the count down to 5, unless you hold Mayor Jimmy
Walker's Favor.
2. Redistribute Titles
Settle the night's grabs. Check control of Borough Deeds, Syndicate Cards, and the Ward Boss card. If a new mob meets a Title's minimum requirements and holds a strict majority, the card is immediately transferred to them. If a Title's conditions are no longer met by anyone, or there is a tie, return it to the Supply.
3. Fulfill Contracts
Remove 1 marker from each of your active Contracts and return it to your Stash. Contract objectives are checked only after Turf Control has been resolved.
- The Deadline: If you removed the final marker, the deadline has arrived. You cannot back out of a promised job. If your current board state meets the objective, the Contract is Completed (add it to your Respect pile and collect the Take). If you missed the objective, the Contract is Botched (discard it face-up into its deck's discard pile for nothing). In this town, nobody pays for 'almost'.
- Commission Check: If a newly completed Contract secures you a full portfolio (1 Gig, 1 Racket, and 1 Score), immediately take a Commission Card.
The Next Day...
If any Kingpin holds a Commission Card AND 20+ Respect, the game ends immediately! (See Winning the Game).
If not, the war continues. Flip the Moon Phase token and begin the next Day's Shadows Phase in Turn Order.
Winning the Game: The Final Reckoning
The war for New York ends the moment a player secures a Commission Card (by completing a
Gig, Racket, and Score) AND amasses 20 or more Total Respect.
1. A Seat at the High Table
Any thug can fire a Tommy gun, but it takes a true mastermind to sit at the High Table. When a newly
completed Contract secures you a full portfolio: 1 Gig, 1 Racket, and 1 Score, immediately take a
Commission Card. A player may only ever claim one.
2. Earning Respect
Legitimacy means nothing if the streets don't fear you. You need 20 Respect to claim the crown. To calculate your current Respect, tally up the spoils of your empire:
- Borough Turf: Gain 3 Respect for each Controlled Borough (2 Respect for Staten Island).
- Ward Boss: Gain 3 Respect if you hold the Ward Boss card at the end of the game.
- Criminal Legends: Gain 1, 3, or 5 Respect for each successfully completed Contract in your ledger.
- Market Dominance: Gain 2 Respect for each Syndicate Card you currently hold.
- Blood Debts: Subtract 1 Respect for every unpaid Loan owed to Shylock. (Shylock always gets his due).
- The Squealer's Grave: Subtract 3 Respect if you are stuck holding the Rat Card at the end of the game. (Nobody crowns a rat).
The Final Standoff
If multiple bosses claim a Commission Card and 20+ Respect on the same night, the streets run red to settle
the score:
- Total Respect: The highest overall Respect takes the crown.
- Cold Hard Cash: If deadlocked, the Kingpin with the fattest bankroll buys the throne
(include the loose change printed on your Playbook).
There are no shared victories in Moonshine Kingdom. You either rule the city alone, or you bleed out in the gutter.
Supply Lines: Smuggling from Rum Row
Smuggling Runs
Havana Rum is top-shelf poison. You can't brew it in a basement; you have to run it through the city's waterways.
Smuggle (Cost: 1 Influence)
At a Dock District you Control, run the blockade to import premium Havana Rum.
- Assign Crew: Send up to 5 Mobsters from the Dock.
- Check Network: Count your Controlled Docks to find your Target Number.
- Roll & Resolve: Roll your dice pool based on Crew Size.
- Success: For every die that meets or beats your Target Number, gain
1 Rum. Place them in the Dock District.
- Intercepted: The Coast Guard is on the prowl. For every die that fails to
meet the Target Number, 1 Mobster is arrested and removed from the board (Runners always
take the fall first).
Example: You control 3 Docks and Smuggle with a crew of 5. Roll 3 dice, succeeding on 3+. A roll of 1, 3, and 5 gains 2 Rum at the Dock; the failed die arrests 1 Mobster.
| Crew Size |
Dice |
| 1-2 Mobsters |
1 |
| 3-4 Mobsters |
2 |
| 5 Mobsters (max) |
3 |
| Dock Network |
Success On Roll |
| 1 Dock |
5-6 |
| 2 Docks |
4-6 |
| 3 Docks |
3-6 |
| 4+ Docks (max) |
2-6 |
Kingpin's Note: Physical logistics have hard limits. Even with Mayor Walker's Favor, production stays capped at 3 Barrels. Muscle past 5 helps Combat dice, not brewing.
Street Math: The Muscle Ratio converts mobsters into output, casualties, arrests, or Combat dice. It caps at 3 for Brewing, Blowbacks, and Raid arrests, and at 5 dice for Combat. The success ladder sets target numbers for Combat Threat and Smuggling networks.
Favors: Friends with benefits
Bribes: The Power Brokers
Money talks, but the right friends scream. These brokers don't carry guns; they carry the city.
If you Control a broker's High Society District, you can buy their loyalty. Pay $2,500 to take their Favor Card and immediately add 1 permanent Influence marker to your Stash.
Honor Among Thieves: You may only buy each broker's Favor once per game. Once bought, their loyalty (and the Influence marker) remains yours even if you lose their District, unless you break a binding deal (see Cooperation).
-
Mayor Jimmy Walker – "The Night Mayor" (Morris Park)
A suit, a smile, and a blind eye to the law. The Mayor keeps the cops looking elsewhere.
City Hall Pass: Your Districts may hold any number of mobsters without penalty during The Sweep.
-
Arnold Rothstein – "The Brain" (Williamsburg)
The man who fixed the World Series doesn't play the game; he owns the casino.
The Inside Vig: Shylock knows who signs his checks. Repay each Shylock's Mark for $1,500 instead of $2,500.
-
Stephanie St. Clair – "Queenie" (Sugar Hill)
The Tiger of Harlem runs the numbers game and makes her friends look untouchable.
Untouchable: Ignore the Greed Tax. You may Unload 4 or more barrels in a single Play without generating Heat.
-
Texas Guinan – "The Hostess" (Richmond Hill)
"Hello, Sucker!" Judges, senators, and stars all drink at Texas Guinan's table.
High Society Whispers: The right whisper opens every door. When you Hustle, draw 3 Contracts instead of 2, and your Hand Limit is increased to 5.
Shylock's Mark
When the walls close in, Shylock offers a lifeline made of barbed wire. Take his cash to survive today, but the debt will bleed you tomorrow.
- The Loan: At any time before the endgame triggers, you may take a Shylock's Mark card to instantly gain $1,500. You may hold multiple marks.
- Paying the Piper: To clear the debt, pay $2,500 to the bank at any time before the game ends (or $1,500 if Arnold Rothstein vouches for you), then discard the card.
- The Toll: Shylock always gets his due. Every unpaid Mark in your ledger at the final Reckoning costs you -1 Respect.
Cooperation: Puppets in the Smoke
Trust is fleeting, but even sharp kingpins need rivals. Every favor granted might be a knife in the back.
Pulling the Strings
At any time during Operations, you may move Influence markers from your Operations to a
rival's Operations (up to their 5 marker cap). This is not a Play and does not end your turn.
- The Favor: You lend your name and network. The rival may use these markers as their
own, immediately or later.
- The Risk: If the rival spends your marker on a Play that generates
Heat, your marker goes to the Heat Track. Otherwise, it returns to your Stash once used.
The Broker's Word: A Binding Handshake
A mobster's word is cheap. When a deal needs teeth, have a Power Broker vouch for you.
Making the Deal
To make a binding deal, a player must have at least one Favor Card.
- State the Terms & Deadline: The terms must be clear, and you must agree on a specific deadline (e.g. "before the Day ends," or "until you pay me $1000").
- Stake the Favor: The player stakes an available Favor Card, placing it between both
players. Each Broker may only vouch for one deal at a time.
Example: "The Mayor vouches for me. If
you let me pass through your Borough unharmed, I promise to give you $1,000 before the end of the Day."
Honoring & Breaking Deals
Deals are resolved the moment their conditions are met or failed.
- Deal Honored: The moment the terms are met, the deal is complete. The Favor Card is immediately returned to its owner.
- Deal Broken: If the agreed deadline passes without the terms being met, or if a player violates a standing agreement for any reason (including third-party interference), the Broker's trust is shattered and your word becomes garbage. The owner must immediately discard the Favor Card and lose its permanent Influence marker.
Deals on the Side
You may wheel and deal outside the rules, but only Cash can be physically traded off the board.
Hand it over anytime, no Influence required.
Barrel Exchanges: Liquor stays on the board. To swap barrels with a rival, use a single Push action — with their permission, you can shift any barrels either way between your District and a Connected one, clearing the whole trade in one Action with no return turn needed.
Combat Rules: Blood on the Streets
Violence isn't a backup plan; it's the cost of doing business. Smart Kingpins know a drawn gun can be stronger than a fired one. When talk
fails, step inside and clear the room.
1. The Rules of Engagement
The mechanics of violence rely on two factors:
The Muscle Ratio (how many dice you roll, capped at 5 in Combat) and Threat (what number kills).
| Mobster Count |
Dice Rolled |
| 1-2 mobsters |
1 die |
| 3-4 mobsters |
2 dice |
| 5-6 mobsters |
3 dice |
| 7-8 mobsters |
4 dice |
| 9+ mobsters |
5 dice |
| Threat Level |
Kill on Roll |
| Level 1 (Base) |
5-6 |
| Level 2 |
4-6 |
| Level 3 |
3-6 |
| Level 4 (Max) |
2-6 |
Calculating Threat
Your Base Threat is Level 1 (Kill on a 5+). This improves with bonuses, which stack up to Level 4:
- Boss Bonus (+1): If your Boss is in the fight.
- Safehouse Bonus (+2): Defenders holding a Secured District (Defending Assaults only).
- Ambush Bonus (+1): Occupiers firing the first shot when enemies enter.
2. The Standoff: Crossing the Line
When an opponent Moves into a District you control, the game pauses. As the Occupier, you
must immediately choose one of three responses:
- Ambush:
You greet the invaders with lead.
- Free Shot: Only the Occupier rolls dice.
- Bonus: Gain +1 Threat.
- Casualties: Hits remove Invaders (Runners first). No Heat. Invaders are now Pinned.
- Hold Fire:
You stand your ground but don't shoot. Maybe they are just passing through? The Invaders are now
Pinned.
- Fold (Cost: 0):
You surrender the District. You may immediately move your mobsters to one Connected Safe
District.
- Panic: Fleeing mobsters cannot carry Liquor; any barrels are left behind. You
also cannot pack up a building--your Safehouse remains.
- The Takeover: The Invader immediately claims Control, captures
dropped Liquor, and may Commandeer or destroy your Safehouse. The Invaders are
not Pinned; their Play ends.
3. Pinned: Fight or Flight
While Pinned, your mobsters cannot make normal Plays. The standoff stays in your turn: spend Influence to Assault or
Advance, or, if you are the Invader, Fall Back for free. Keep choosing
until Pinned is resolved, or the Invader runs dry and must Fall Back.
The Cost of Pride: A real Kingpin knows an all-out firefight is bad business. Burning 3 or 4 Influence on one stubborn Assault may win the alley, but it leaves rivals free across the city. Talk is cheap; bullets cost time.
Torch, Plunder, Courage, and Firepower may still be used while Pinned.
| Assault (Cost: 1 Influence) |
Fight for the District. Both sides roll simultaneously.
- Casualties: Both sides apply hits (Runners first).
Defenders lose Ambush bonus but keep Safehouse/Boss bonuses.
- Heat: If the Attacker kills Defenders, gain Heat .
Defenders gain no Heat for self-defense kills.
- Repeat: If both sides stand, remain Pinned. Spend another Influence to Assault again.
|
| Advance (Cost: 1 Influence) |
Shoot your way out. Move Pinned mobsters (and up to 1 barrel each) to any Safe Connected District,
including across water via Docks. You cannot enter hostile turf.
|
Fall Back (Cost: 0 Influence)
(Invader Only) |
Cut and run. Retreat to the origin District you entered from. Carried Liquor is left behind for the Defender.
If you have 0 Influence remaining, you must Fall Back.
|
4. Victory & Consequences
Combat ends when one side is eliminated or the attacker retreats.
If the Defender Holds:
The District remains theirs. Liquor dropped by dead Invaders becomes Defender property.
If the Invader Wins:
If the last Defender falls or flees, you immediately claim Control of the District.
- The Spoils: Any Liquor in the District is now yours.
- Safehouses: If the District contained a Rival Safehouse, it is destroyed (remove it).
However, you may choose to Commandeer it instead: immediately Secure the district for
free (Cost: 0 Influence)
by placing one of your own Safehouses there. If you have no spare Safehouses, you must relocate an
existing one. Note: You may also Commandeer a Defenseless Safehouse simply by Moving into its District.
Example: Battle for the Docks
Setup: The Knights (1 Boss, 3 Runners) move into a Dock District held by the Irish (1
Boss,
2 Runners, Safehouse), in an attempt to strengthen their Smuggling efficiency.
1. The Standoff
The Irish (Occupier) refuse to Fold, choosing to Ambush. They fire first. The Knights do not roll yet.
| Faction |
Strength |
Threat |
Roll & Result |
Irish
(Defender) |
3 Mobsters
(2 Dice) |
Level 3 (Hit 3+)
(Base + Boss + Ambush) |
Roll: [2, 5]
1 Hit |
Result: Knights lose 1 Runner. The Irish generate no Heat for this
defensive Ambush.
Knights are now Pinned.
2. The Assault (Round 1)
The Knights choose to fight. Both sides roll simultaneously.
| Faction |
Strength |
Threat |
Roll & Result |
Knights
(Attacker) |
3 Mobsters
(2 Dice) |
Level 2 (Hit 4+)
(Base + Boss) |
Roll: [4, 6]
2 Hits |
Irish
(Defender) |
3 Mobsters
(2 Dice) |
Level 4 (Hit 2+)
(Base + Boss + House) |
Roll: [1, 5]
1 Hit |
3. The Resolution (After Round 1)
- Casualties: Irish take 2 hits (remove 2 Runners). Knights take 1 hit (remove 1
Runner).
- Status: Both sides still have units (Boss + Runner vs Boss). Knights are still
Pinned.
4. The Assault (Round 2)
The Knights spend another Influence to Assault.
| Faction |
Strength |
Threat |
Roll & Result |
Knights
(Attacker) |
2 Mobsters
(1 Die) |
Level 2 (Hit 4+)
(Base + Boss) |
Roll: [5]
1 Hit |
Irish
(Defender) |
1 Mobster
(1 Die) |
Level 4 (Hit 2+)
(Base + Boss + House) |
Roll: [1]
0 Hits |
5. Victory & Commandeering
- Casualties: The Irish Boss is eliminated. The Knights lose no one this round.
- Heat: The Knights killed enemies, so gain Heat .
- Outcome: The Knights claim the District and choose to
Commandeer the Safehouse, immediately Securing it with their own Safehouse.
With combat resolved, the Play comes to an end. The player with the next Turn Token now takes
their turn.
Heat: Playing with Fire
Heat measures how much the law is breathing down your neck. The Heat
Tracker is a 5-space communal powder keg. When you generate Heat, you must place one Influence
marker on the track. Played right, Heat is a weapon you can use to sic the Feds on your rivals. Played wrong, it's a noose around your own neck.
Drawing Heat
These noisy Plays draw unwanted headlines and push the track up one notch:
- Blood on the Pavement: Violence gets noticed. If the Attacker in
a combat Play (the player who initiated Combat) inflicts 1 or more kills, they must add 1
marker to the Heat track at the conclusion of the Play.
Note: A multi-round Assault is still a single Play and generates Heat only once.
Defenders acting in self-defense never generate Heat.
- Shakedowns Get Loud: If an Extort Play earns $800 or more, locals complain and you generate Heat .
- The Greed Tax: Moving massive product attracts federal eyes. Triggering The Greed Tax by Unloading 4+ barrels generates
Heat .
Police Raids: The Boiling Point
When the 5th marker hits the Heat Track (or a rival plays the Rat Power Play), the sirens wail. Pause the current turn immediately. The city is going on lockdown.
(Note: If the Raid was triggered naturally by the 5th marker hitting the track, the heat is on everybody and old grudges are forgotten--immediately return the Rat Card to the supply.)
1. Public Enemy Number One
The Feds don't care who started the war; they only care who's making the most noise. They target the mob with the most markers currently sitting on the Heat Track. That player becomes the Target.
The Fresh Scent Rule (Tiebreaker): If mobs are tied for the most markers, the Police chase the freshest lead: the tied mob whose marker is furthest to the right on the track (the most recently placed). A Raid only ever targets one player.
2. Precision Strikes
The Feds mobilize from their strongholds. For each Precinct on the board, the Police raid exactly one adjacent District within the same Borough that is Controlled by the Target.
The Police strike where the footprint is largest, targeting the District with the most illegal activity:
- The Big Bust: The Police target the adjacent District containing the highest total number of units (Mobsters + Liquor Barrels combined).
- The Target's Call: If multiple valid Districts are tied for the most units, the Target chooses which of those operations takes the hit.
3. The Ultimatum: Bribe or Bleed
Resolve each hit District separately. For each one, the Target must make a brutal choice:
- Pay the Bribe: Hand $1,000 to the bank. The cops look the other way. Your Liquor and mobsters remain safe.
- Take the Fall: Pay nothing, and lose everything. The raid is a success. Return all Liquor in the District to the supply, then suffer arrests based on The Muscle Ratio (capped at 3; Runners take the cuffs first).
The Aftermath: Once all strikes are resolved, the Feds rebuild their broken stations (see Federal Rebuilding). Then, return all Influence markers on the Heat Track to their owners' Stashes and resume the paused turn.
The Law: Fighting the Blue Wall
The Police are a static, automated faction. They don't take turns, collect liquor, or Ambush; they just stand firm and guard their turf.
The Blue Wall
Any District containing a Precinct is considered Police Turf.
- Confiscation & Lockdown: You may freely Move into a Police District. However, you can't sneak hooch past a station house. Any Liquor carried into Police Turf is instantly seized and returned to the supply. Your mobsters are immediately Pinned. From here, you must spend Influence to either Advance (walk through to a safe connected District), Fall Back, or Storm the Precinct.
Storm the Precinct (Cost: 1 Influence)
You don't negotiate with the blue wall; you tear it down. If you want to clear a Precinct, you have to burn it to the ground. This is a high-stakes, all-or-nothing assault. Bring body bags.
- The Charge: Roll your Attack Dice (calculated via The Muscle Ratio) and apply your current Threat Level.
- The Toll: The Police are firing from fortified cover; they do not roll defense dice. Instead, every failed die immediately kills 1 of your mobsters in the crossfire (Runners take the bullet first).
- The Outcome: You need 2+ Hits to break their lines. There is no multi-round combat; you get one shot.
- Success (2+ Hits): The Precinct is destroyed (return to supply). You claim Control of the District and may immediately Commandeer it (Secure a Safehouse for free).
- Failure (0-1 Hits): The assault is broken. Your surviving mobsters are repelled and must immediately Fall Back to the District they entered from.
Federal Rebuilding (Respawn)
The law never bleeds for long. Immediately after every Police Raid, the city rebuilds its shattered precincts. Any destroyed Precincts currently in the supply are returned to the board in their home Borough. Place each returning Precinct in the first Unoccupied District reading top-to-bottom on the Town Planning Ledger (found on the Turn Summary card). If no Districts in that Borough are unoccupied, the Precinct remains in the supply.
The Blood Oath: 4-Player Team Variant
When the heat boils over, enemies become brothers. The Feds are kicking down doors, and lone wolves are getting slaughtered. To survive, you must forge a new family.
The Blood Oath is the recommended full 4-player mode. It starts as a cutthroat free-for-all, but escalating police pressure eventually forces the board into two permanent 2v2 alliances.
Setup: The Ticking Clock
Set up the game exactly as a standard 4-player match, with one addition: Place the Federal Crackdown
Tracker near the Heat Track, with a tracking token on the first space.
Advancing the Clock: Every time a Police Raid triggers (whether by a player using the
Rat Play or the Heat Track hitting Boiling Point), advance the crackdown token one space.
The Sit-Down
The moment the token reaches space 10 on the Crackdown Tracker, the underworld snaps.
Pause the game. The four independent mobs immediately form two permanent alliances.
- Rank the Bosses: Tally everyone's current Respect (scoring held Titles and completed Contracts). Tiebreaker: Total Cash on hand.
- Forge the Families: The player in 1st Place joins forces with the player in 4th Place. The player in 2nd Place pairs with the player in 3rd Place.
New Rules of Engagement
You and your partner now share a single goal: total domination. However, you still run your own distinct crews.
- Separate Ledgers: You do not share Cash, Influence, Contracts, or Hand Limits. You still take individual turns in Turn Order.
- Blood is Thicker: You cannot Ambush or Assault your partner's mobsters. You may safely Move through their Controlled Districts without triggering combat.
- The Golden Rule of Turf: You still cannot share a block. You may not end your Phase with mobsters in a District occupied by your partner. If you Push Liquor into their District, it instantly becomes their property.
- Puppeteering: Lending Influence to your partner is no longer a fragile truce—it is your strongest weapon. You may freely move Influence to your partner's Operations board to fund their turn (standard Puppeteering Heat rules apply).
Claiming the Empire
The Commission no longer deals with lone wolves; they only recognize unified power. To win the game, an Alliance must collectively possess at least 1 Commission Card (earned by either partner) and reach a Combined Total of 35 Respect.
If an Alliance meets these conditions during the Reckoning Phase, the game ends immediately.
The New Kings of New York
When the game ends, tally the final Respect for all four players individually (applying all standard Title points, Contract payouts, and Shylock debt penalties). The Alliance with the highest Combined Respect wins the war.
The Capo di Tutti Capi: There are no truly shared victories... even in a team. Within the winning Alliance, the player who contributed the most Respect to the final combined total is declared the Boss of Bosses and the true Kingpin of New York. Your partner doesn't get a crown; they just get the privilege of kissing your ring.